Your first program
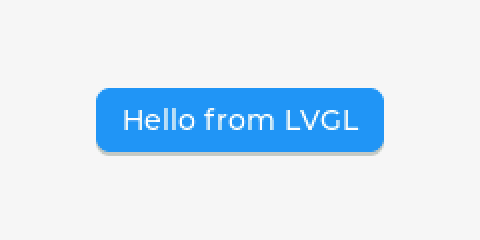
This program draws a button with a label on a 240 by 120 display and handles one click. It needs no screen: LVGL draws into a buffer you hand it, and a flush callback tells you when a frame is ready. That is the same shape on a desktop, in firmware, and in a test.
import lvgl as lv

lv.init()
disp = lv.display_create(240, 120)
disp.set_color_format(lv.COLOR_FORMAT.RGB565)
buf = bytearray(240 * 120 * 2)
disp.set_buffers(buf, None, len(buf), lv.DISPLAY_RENDER_MODE.FULL)
flushed = []
disp.set_flush_cb(lambda d, area, px: (flushed.append(area.get_width()), d.flush_ready()))

button = lv.button(lv.screen_active())
button.center()
label = lv.label(button)
label.set_text("Hello from LVGL")
button.add_event_cb(lambda e: print("clicked"), lv.EVENT.CLICKED, None)
button.send_event(lv.EVENT.CLICKED, None)

lv.tick_inc(50)
lv.refr_now(disp)
print(label.get_text(), "- drew", flushed[-1], "px wide")
Save it as hello.py. Run it with python hello.py on CPython,
micropython hello.py on a MicroPython-compatible interpreter, or
circuitpython hello.py on a CircuitPython-compatible one. Each prints the
same thing:
clicked
Hello from LVGL - drew 240 px wide
What each part does
lv.display_create(240, 120) makes a display of that size, and
set_buffers gives it a buffer to draw into. DISPLAY_RENDER_MODE.FULL
redraws the whole frame each time, so the buffer is 240 * 120 * 2 bytes for
16-bit color.
set_flush_cb registers the function LVGL calls when it has pixels for you.
On a real display you would copy px to the panel there. Calling
d.flush_ready() tells LVGL the copy is done.
Every widget takes its parent: lv.button(lv.screen_active()),
then lv.label(button). add_event_cb attaches a handler, and send_event
fires one by hand so the example needs no pointer.
LVGL keeps time from the ticks you give it. lv.tick_inc(50) says 50 ms have
passed, and lv.refr_now(disp) draws now instead of waiting for the next
lv.timer_handler().
See the frame
The buffer holds the finished frame. With Pillow, add these lines to turn it into a PNG:
from PIL import Image
Image.frombytes("RGB", (240, 120), bytes(buf), "raw", "BGR;16").save("hello.png")
On a board
On a board, omnipython supplies a
display_driver module that creates the display from your board
configuration, feeds LVGL its ticks and input, and keeps the screen updating.
Import it before lvgl, then build widgets on lv.screen_active() as above.
Using LVGL with OmniPython
covers what it does and how its timers behave. Keep every lvgl call on one
thread: Use LVGL from threads.